

Saturday, 29 October 2011
Small Boy - Character Designs
Some sketches for the design of my second character - a small boy. Inspired by work by artists like Seymour, Hammo & Jamie Hewlett.


Wednesday, 19 October 2011

Tuesday, 11 October 2011
z-brush tips
Just got some z-brush questions answered by the very talented Mr Sergio Caires:
q) How do you import a the set of objs that make up a character into z-brush?
a) Import one of the objs (doesn't matter which) then import the rest and add them as subtools. Finally, save the lot as a z-tool
q) Do I need to UV in maya before sculpting in z-brush?
a) No: you can do your z-brush work, export the basic level geometry, then UV it, and when you bring it back into z-brush the higher division sculpting detail will be retained
q) How do you import a the set of objs that make up a character into z-brush?
a) Import one of the objs (doesn't matter which) then import the rest and add them as subtools. Finally, save the lot as a z-tool
q) Do I need to UV in maya before sculpting in z-brush?
a) No: you can do your z-brush work, export the basic level geometry, then UV it, and when you bring it back into z-brush the higher division sculpting detail will be retained
More hair modelling
I've been playing around in z-brush to try to get the hair as I want it. It's been slow progress but I've learnt a lot about various brushes in the process. These shapes were made using displace then slide then (most importantly) polish. Not perfect, but definitely getting closer:


Tuesday, 4 October 2011

Wednesday, 28 September 2011
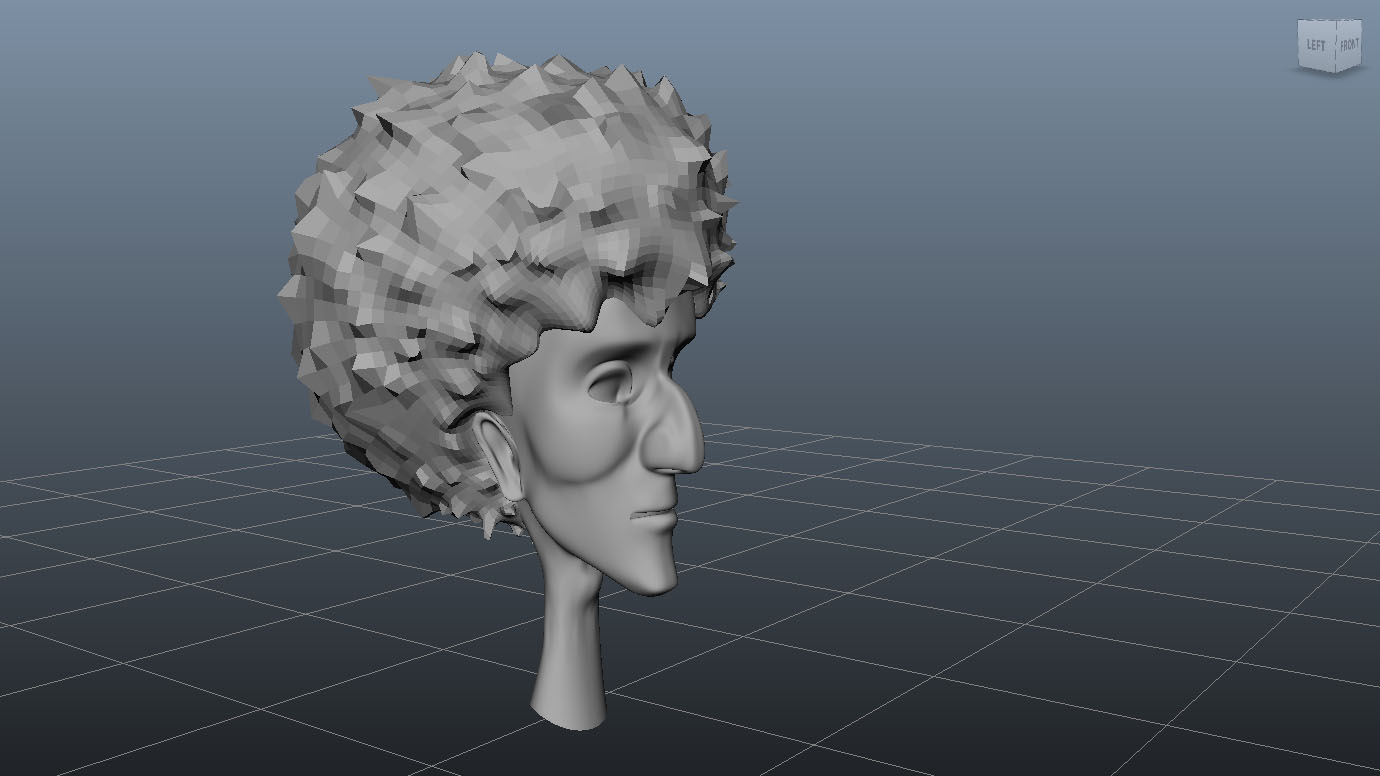
Stylised hair
This is fractionally closer to what I'm aiming for but only when the model's not smoothed - time for another test.

Tuesday, 27 September 2011
Hair Test
A first tryout of the snake hook tool in zbrush to sculpt stylised hair. Not really what I'm aiming for! Time to try a different approach.


Monday, 26 September 2011
Duplicate Special!
Just figured out a really useful option in maya :)
I'd got used to using the sculpting symetry function in zbrush whereby any changes I make get applied to both sides of the model.
So in maya I found the "duplicate special" option in the edit menu and hey presto my changes get applied symmetrically. Hooray!
I'd got used to using the sculpting symetry function in zbrush whereby any changes I make get applied to both sides of the model.
So in maya I found the "duplicate special" option in the edit menu and hey presto my changes get applied symmetrically. Hooray!
Tuesday, 12 July 2011
Reference: Skoda Ad
I'm still developing ideas for both the story and the final look: I had thought of using realistic paper textures and an animation style based on origami, however, I'm now thinking that this has been used too much recently. There are some amazing examples out there (see below and the Asics ad earlier on the blog). Rather than creating a pale imitation of these I think I'll try to develop my look down a different stylised route.
Modelling: Jacket
For some reason I had a total nightmare with the topography for the writer's jacket . . . . you can see some of my early attempts below.
It was confusing trying to get the right shape for the object whilst at the same time trying to get the polys to flow in a way that would enable me to add the creases at a later date.
I've now got a version that I'm more or less happy with (see previous post for an image of this) so fingers crossed that it holds up as I progress along the pipeline.
Here are the attempts that didn't make it!


It was confusing trying to get the right shape for the object whilst at the same time trying to get the polys to flow in a way that would enable me to add the creases at a later date.
I've now got a version that I'm more or less happy with (see previous post for an image of this) so fingers crossed that it holds up as I progress along the pipeline.
Here are the attempts that didn't make it!


Subscribe to:
Posts (Atom)