I'm gong to experiment a bit more with toon shading so here's a link for my reference:
http://www.youtube.com/watch?v=xZfoo6GEOCs

Monday, 13 January 2014

Friday, 15 November 2013
Maya Cross Hatching
I've been pondering how to give a less 'CG' look to my film so here's a link for future reference.
The clip of the rotating shape is ace.
http://area.autodesk.com/blogs/duncan/crosshatch_shading
The clip of the rotating shape is ace.
http://area.autodesk.com/blogs/duncan/crosshatch_shading
Wednesday, 2 October 2013
Selection Highlighting
A very dumb problem that was getting to me yesterday. Highlighting on selected objects didn't show up in the perspective view (though it worked on front / side / top etc.)
I knew that I must have accidentally checked / unchecked a box somewhere but couldn't find it. I'm even sure that I tried the "show" menu in the persp view but I can't have been looking very carefully because it turns out that - when I looked again this morning - there it was!
So, to solve the problem: in whichever view you're having problems with go to the "show" menu and make sure that "selection highlighting" is checked. (In my case I had to uncheck and re-check it to get it to work.)
Hope that helps anyone else who's temporarily lost in maya menus :)
I knew that I must have accidentally checked / unchecked a box somewhere but couldn't find it. I'm even sure that I tried the "show" menu in the persp view but I can't have been looking very carefully because it turns out that - when I looked again this morning - there it was!
So, to solve the problem: in whichever view you're having problems with go to the "show" menu and make sure that "selection highlighting" is checked. (In my case I had to uncheck and re-check it to get it to work.)
Hope that helps anyone else who's temporarily lost in maya menus :)
Wednesday, 18 September 2013
Worried pacing movie reference
This is great reference for the writer's worried pacing, it captures some aspects of the character really well: stuck in a bedsit, worried about what's going on opposite outside the window.
The source was Getty Images - http://www.gettyimages.co.uk/detail/video/worried-man-sitting-at-table-pacing-to-bed-stock-video-footage/mr_00056042
Friday, 23 August 2013
mel scripts: select all anim curves & select all keys
These wee bits of mel have proved incredibly useful recently as I've been doing some shot layout:
This selects all animCurve nodes
select -r `ls -typ animCurve`;
This selects all keys on all animCurve nodes
selectKey`ls -typ animCurve`;
This selects all animCurve nodes
select -r `ls -typ animCurve`;
This selects all keys on all animCurve nodes
selectKey`ls -typ animCurve`;
Maya convert instance to object
My street environment was created with tons of instancing - including groups containing instances which were then instanced in turn. I'm not hugely familiar with instancing but it wound up creating problems in terms of flexibility of editing objects and general bugginess so I decided to convert the instances into objects in their own right.
This, it turns out, wasn't as easy as I might have thought.
I tried various methods including the menu item modify/convert/instance to object. My problem with using this is that you seem to need to do it in the 'correct order' otherwise instances of objects just disappear.
In the end the method I used is pretty labour intensive, but it works reliably without geometry going awol.
1) group all of the objects that you want to apply the instance-to-object conversion to - including all geometry that is (or in my case, might be ;) the originals of instanced geometry
2) using the outliner "expand all" in the group (shift and left click on the + sign next to the group)
3) select all items within the group
4) run this mel script duplicate -un
5) whilst the duplicated objects are still selected group and unparent them
6) delete the original group
7) repeat the above until all instances are objects (this is the labour intensive bit!)
This, it turns out, wasn't as easy as I might have thought.
I tried various methods including the menu item modify/convert/instance to object. My problem with using this is that you seem to need to do it in the 'correct order' otherwise instances of objects just disappear.
In the end the method I used is pretty labour intensive, but it works reliably without geometry going awol.
1) group all of the objects that you want to apply the instance-to-object conversion to - including all geometry that is (or in my case, might be ;) the originals of instanced geometry
2) using the outliner "expand all" in the group (shift and left click on the + sign next to the group)
3) select all items within the group
4) run this mel script duplicate -un
5) whilst the duplicated objects are still selected group and unparent them
6) delete the original group
7) repeat the above until all instances are objects (this is the labour intensive bit!)
Thursday, 4 July 2013
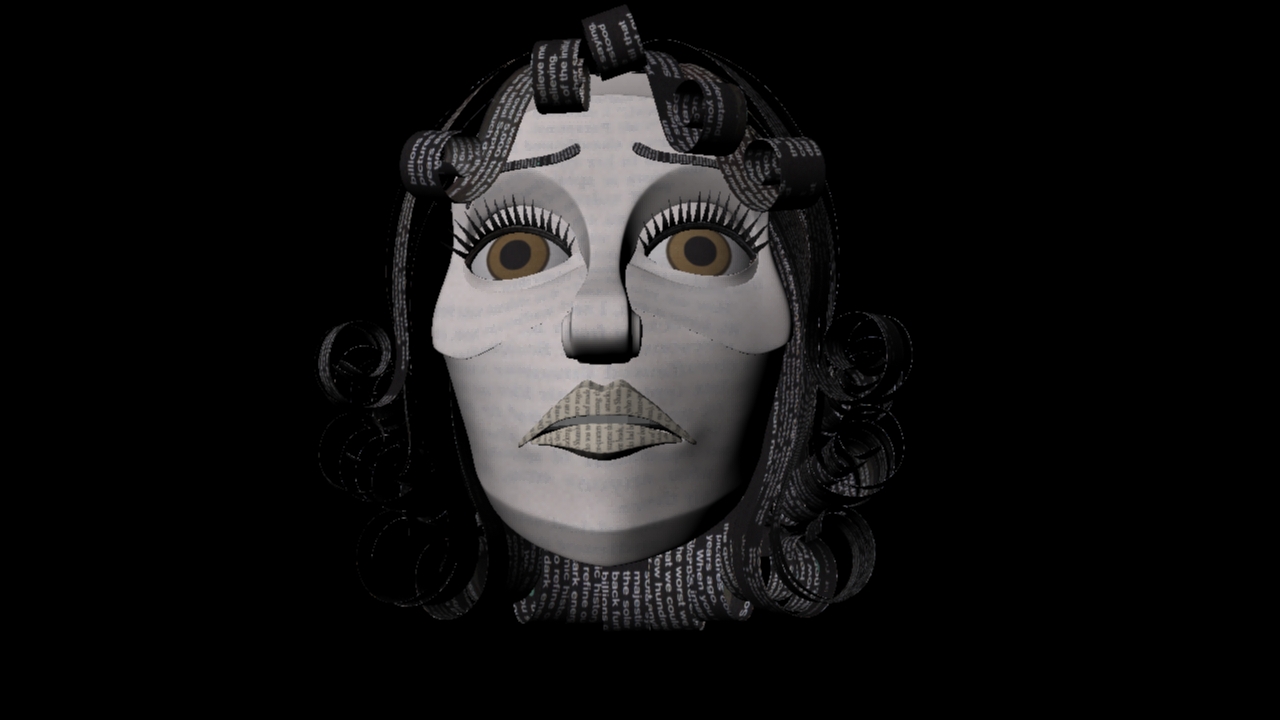
Margarita - Blend Shapes
Blendshapes for Margarita are coming together :)

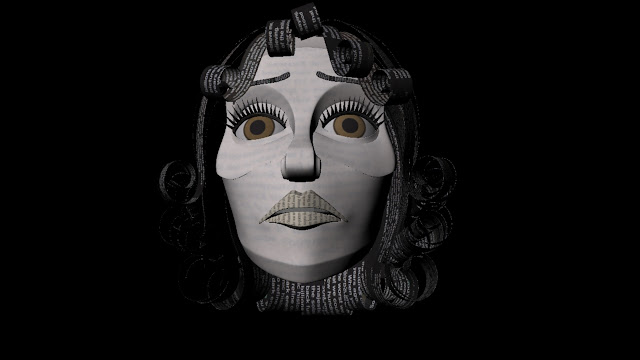


Just have to tweak her smile a bit, and then polish all shapes so that they work together.
Here are a couple of expressions . . .



Monday, 1 July 2013
Tech Tips - symmetrical modelling with reflection in maya
OK, I can't decide whether I'm pleased to have found this or gutted that I'd already done so much modelling before I found it.
But I've finally figured out how to keep a model symmetrical when I make adjustments to vertices on one side.
Turns out that the move tool had a reflection setting all along! See the pic below for where to find it.
I'm looking forward to some happy modelling and much less "mirror geometry" from now on!

But I've finally figured out how to keep a model symmetrical when I make adjustments to vertices on one side.
Turns out that the move tool had a reflection setting all along! See the pic below for where to find it.
I'm looking forward to some happy modelling and much less "mirror geometry" from now on!

Tuesday, 16 April 2013
Maya - easily align vertices
1. Select your vertices
2. Select the move tool
3. Open the tool settings (click the SHOW OR HIDE TOOL SETTINGS button above the channel box)
4. Set it to WORLD SPACE and turn off RETAIN COMPONENT SPACING.
5. Hold X to snap to grid, then grab one of the move handles and move it.
Voila.
Thanks faultymoose http://forums.cgsociety.org/archive/index.php/t-425652.html
2. Select the move tool
3. Open the tool settings (click the SHOW OR HIDE TOOL SETTINGS button above the channel box)
4. Set it to WORLD SPACE and turn off RETAIN COMPONENT SPACING.
5. Hold X to snap to grid, then grab one of the move handles and move it.
Voila.
Thanks faultymoose http://forums.cgsociety.org/archive/index.php/t-425652.html
Maya - snap pivot to edge / vertex / grid
Select your object then hit the insert key. This lets you move the pivot around. Now the trick to get it aligned to an edge is to hold the C key then move you mouse cursor over to the edge you want to snap to. Click the middle mouse button and move the mouse slightly while holding the middle mouse button. The pivot will jump to the edge. While you have the middle mouse button held you can slide the pivot along the edge. You can also do this with the V key for snapping to vertexs and the X key to snap to grid.
Thanks pyromania: http://www.polycount.com/forum/showthread.php?t=37371
Thanks pyromania: http://www.polycount.com/forum/showthread.php?t=37371
Tuesday, 2 April 2013

Wednesday, 27 March 2013
Mental Ray Contour Shader
I need to start rendering again and realised that I'd pretty much forgotton how to render contours so here are some notes to myself for the rest of the shots :)
1) In render settings enable contour rendering. For my specific purposes I've also gone for hide source (I don't want any other textures, lighting etc visible in my contour layer - I'll comp those together later), flood colour is white (it could be anything, I'm going to key it out in the comp), over sample value of 30 (I need it this high to get reasonable quality and the render times are fine), gaussian filter and filter support of 2.

2) Pipe in "contour_contrast_function_levels" to Contrast Shader and "contour_store_function" into Store shader. (See below for where to find these in the hypershader.)

3) The settings I used for the contour_contrast utilitiy are below. To make sure I got the outlines I needed and to prevent broken lines, contours flickering on and off etc etc I went for diff mat which draws a countour line between different materials. This meant that I had to apply multiple materials to a single object, by applying individual shaders to the faces that I wanted to be outlined

4) For contours which get narrower with distance from the camera plug the "contour_shader_depthfade" utility into the shading group for the material

5) Starter settings for the depthfade utility are below. These need to be tweaked on a shot-by-shot basis depending on camera / lens etc.

I used tons of different resources to get this right but here's one that was pretty clear :)
http://wiki.bk.tudelft.nl/toi-pedia/Mental_Ray_Contour_Shader_tutorial
1) In render settings enable contour rendering. For my specific purposes I've also gone for hide source (I don't want any other textures, lighting etc visible in my contour layer - I'll comp those together later), flood colour is white (it could be anything, I'm going to key it out in the comp), over sample value of 30 (I need it this high to get reasonable quality and the render times are fine), gaussian filter and filter support of 2.


Tuesday, 12 February 2013
Paper Textures


Wednesday, 22 August 2012
The Writer: Trailer
Here's the trailer for the film in the form of the first shots . . . now just the rest to make :)
Environment: final look
Here are some stills showing the textured environment with contour outlines comped on and integrated with background artwork from David Fleck


Friday, 10 August 2012
LRC - some images from my comped shots
An update on lighting, rendering and compositing . . . here are some stills from my comps:


Saturday, 4 August 2012
Lighting: Lighting Sandbox, nighttime scene
Some early tests for the lighting in my night time shots . . .
. . . and here's what you tube had to say about my lighting skills!

. . . and here's what you tube had to say about my lighting skills!

Friday, 3 August 2012
Photon Colour
This is not so much a tech tip as a tech question. I've found that with one point light and one area light in my scene if I set them both to emit photons I can't get them to emit photons of different colours.
They either default back to white, or back to the colour that I set for the first light.
In the attribute editor I'm able to edit the colour and it looks as though it's changed - but the next time I go into the AO for the relevant light the colour has defaulted back to one of the scenarios described above.
Either I'm missing something really obvious or it's a bug in maya so if anyone has any answers please let me know.
They either default back to white, or back to the colour that I set for the first light.
In the attribute editor I'm able to edit the colour and it looks as though it's changed - but the next time I go into the AO for the relevant light the colour has defaulted back to one of the scenarios described above.
Either I'm missing something really obvious or it's a bug in maya so if anyone has any answers please let me know.
Thursday, 2 August 2012
Tech Tips: frame offset with mental ray mv2DToxik pass
I've been having all sorts of problems whereby passes from any render layers which aren't my "main" layer (in this case AO and mattes) didn't line up with the passes from my main layer. They appeared to have a temporal offset of a fraction of a frame.
I've read a few forum threads and this is what I think was happening . . .
In order to calculate vector information the motion vector pass renders with a 1/2 frame shutter offset (I think it's 1/2 a frame but don't quote me on that - I'm going to read up on the maths behind this when I have more time). All the other passes in that layer are rendered with the same offset (in my case that was beauty, spec, reflection, shadow etc etc). However, any layers without an MV pass associated still render on whole frames (my AO and matte passes). Hence the offset in my comp!
The solution:
Number 1:
In render globals under the Quality Tab turn on Motion Blur
(temporarily). Go to the "Motion Offsets" tab. Check "Custom Motion
Offsets" ON. From there set the "Motion Back Offset" to 0.00. Finally,
just turn off Motion Blur. This disables the 1/2 frame offset on any layers with the mv2d render
pass.
Number 2:
Under the Options Tab, expand the "Mental Ray Overrides" tab. Scroll down to the "Performance" Tab. If you check "Force Motion Vector Computation" ON, it forces that offset on all your render layers, even if you don't have that mv2d pass associated with that render layer.
Thanks to the following for helping me figure this one out:
Wednesday, 1 August 2012
Comping: sample Nuke script
Now that I've finally fixed my rendering problems and have some frames to play with I'm LOVING using Nuke.
With less than two weeks to learn Nuke from scratch and comp my shots I've (obviously) barely scratched the surface, but it's clearly a genius software (and whoever thought of the tab function deserves a knighthood, or at least a pint).
Really all I've had time for in Nuke is to realise how much functionality there is which I'm not going to get my head around in time for my masters hand-in ;) but below is a sample script from one of my shots which has the basics (grades, colour correction, depth, DoF, motion blur etc) plus a few dust particles, god rays and a contour line overlay for good measure.

With less than two weeks to learn Nuke from scratch and comp my shots I've (obviously) barely scratched the surface, but it's clearly a genius software (and whoever thought of the tab function deserves a knighthood, or at least a pint).
Really all I've had time for in Nuke is to realise how much functionality there is which I'm not going to get my head around in time for my masters hand-in ;) but below is a sample script from one of my shots which has the basics (grades, colour correction, depth, DoF, motion blur etc) plus a few dust particles, god rays and a contour line overlay for good measure.

Subscribe to:
Posts (Atom)